




FAQs
8/13/2026
Contents
Products
Residential Lawns






Explore
Where to Buy


To dethatch a lawn, check that the thatch layer is over about 1/2 inch, mow slightly lower than usual, mark sprinklers, use a thatch rake or power tool, remove debris, then water and overseed if needed. The best timing is active growth, not heat, drought, or dormancy.
A thick layer of old grass and stems can slowly build up near the soil without being obvious from above. Over time, the lawn may start to feel soft, absorb water poorly, and respond less well to normal feeding.
In this blog, you’ll learn how to dethatch a lawn, how to tell when the thatch layer is too thick, which tools work best, when to do the job, and how to care for the grass afterward so it can grow back evenly.

Thatch is a tight layer of dead stems, stolons, roots, and organic material that builds up above the soil and below the green grass blades. It is not the same as loose clippings left after mowing. Short grass clippings usually break down quickly, while thatch forms a dense mat that can hold moisture and block movement into the root zone.
A thin thatch layer, around 1/4 inch, can protect crowns and reduce minor temperature swings. Trouble starts when it reaches about 1/2 inch or more. At that point, water may run off instead of soaking in, fertilizer may sit near the surface, and roots may grow into the thatch instead of the soil. That makes grass weaker during summer heat, drought, disease pressure, and heavy foot traffic.
Some grasses naturally produce more thatch, especially aggressive spreading grasses such as Kentucky bluegrass, bermudagrass, zoysia, and some ryegrass blends. Overfertilizing with high nitrogen, watering too often, mowing too high without enough breakdown, and compacted soil can also speed up the problem. Dethatching removes the excess layer so the lawn can breathe again.
Do not dethatch just because the lawn looks tired. Dethatching is useful when the thatch layer is actually too thick. If the problem is drought, shade, grubs, poor soil, or disease, ripping through the surface can create extra stress without fixing the real cause.
The simplest check is a small soil plug test. Cut out a wedge of turf about 2 to 3 inches deep, then look for the brown, spongy layer between green blades and soil. Measure it with a ruler. If it is under 1/2 inch, routine mowing, aeration, compost, and better watering may be enough. If it is over 1/2 inch and the lawn struggles to absorb water, dethatching is more likely to help.
Other signs include:
The best time to dethatch is when grass is actively growing and has enough weeks left to recover. The work tears and opens the surface, so timing matters. Avoid dethatching during drought, extreme heat, hard dormancy, freezing weather, or right after applying herbicide.
Cool-season grasses such as Kentucky bluegrass, perennial ryegrass, and tall fescue usually recover best in early fall, when daytime temperatures are often between 60°F and 75°F and soil still holds warmth. Early spring can work for light dethatching, but it may also disturb young weed seedlings and leave less recovery time before summer stress. If you plan to overseed, early fall is usually the better window because seed has cooler air, warm soil, and less competition.
Warm-season grasses such as bermudagrass, zoysia, St. Augustine, and centipede should be dethatched after full green-up, usually late spring to early summer in many regions. The grass should be growing strongly, not just waking up. Wait until soil temperatures are consistently warm and the lawn has been mowed a few times. Do not dethatch warm-season turf in late fall because it may not heal before dormancy.
Good preparation makes dethatching cleaner and safer. Work in dry, mild weather, but avoid bone-dry soil. Slightly moist soil helps tools lift thatch without tearing the lawn apart. The steps below apply to most home lawns, but always adjust for grass type, tool power, and lawn condition.
Mow the lawn a little lower than normal before dethatching. Do not scalp it; simply reduce the height enough so the tool can reach the thatch layer. For many lawns, cutting about 1/2 inch lower than the regular mowing height is enough. Bag or collect the clippings so they do not mix with the loosened debris.
Before using any mechanical tool, mark sprinkler heads, valve boxes, drain covers, shallow cable lines, and landscape edging. Small flags or bright stakes work well. This protects irrigation parts and helps you avoid expensive damage. If the lawn has steep slopes, exposed roots, or thin areas, plan to use a lighter setting there.
A thatch rake works well for small lawns or light buildup. It uses sharp, curved tines to pull the mat upward. It is slower and more physical, but it gives you strong control around flower beds, trees, and sprinkler heads. For larger lawns, a power rake or vertical mower can remove more material in less time.
Set mechanical tools conservatively at first. The blades or tines should comb through the thatch, not dig deeply into the soil. Make one pass, inspect the debris and turf, then adjust only if needed. For heavy thatch, two lighter passes in opposite directions are usually safer than one aggressive pass.
After dethatching, the lawn may look messy. This is normal. Rake up the loosened thatch thoroughly, or use a mower with a bagging attachment after the debris dries slightly. Leaving piles on the lawn can smother grass and slow recovery. Compost the debris only if it is free of disease, weed seed, or chemical residues that make composting unsuitable.
Check the surface after cleanup. If you see bare soil, thin patches, or uneven spots, lightly loosen the top 1/4 inch of soil with a rake. This gives seed a better place to settle. Avoid adding thick layers of soil across the whole lawn unless you are also leveling, because heavy topdressing can bury stressed grass crowns.
Water the lawn after cleanup so the root zone stays evenly moist. Do not flood it. A deep watering of about 1/2 inch can help settle the surface, then lighter irrigation may be needed for overseeded areas until germination. If you overseed, keep the top layer consistently moist for the first 10 to 21 days, depending on the grass type and weather.
Use a starter fertilizer if you are seeding, or a balanced lawn fertilizer if the lawn only needs recovery support. Follow the label rate carefully. Too much nitrogen right after dethatching can push blade growth before roots are ready. Wait to mow again until the grass stands upright and new seedlings, if added, are tall enough for a clean cut.
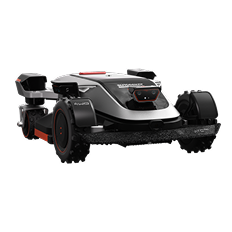
After the lawn has recovered, steady mowing helps keep new growth even and reduces the stress that can follow heavy renovation work. For established turf, the Sunseeker Elite X5 can support routine mowing with AONavi positioning, Vision AI obstacle awareness, and all-wheel-drive movement across uneven lawn areas. A consistent cut helps the repaired surface settle into a cleaner, more uniform look after dethatching.

Dethatching and aeration are often mentioned together, but they solve different lawn problems. Dethatching removes a dense organic mat near the surface, while aeration opens compacted soil so roots can access more air and water.
Use the table below to match the symptom to the more suitable lawn care task. Some lawns need both, but it is usually better to identify the main problem first instead of doing every aggressive treatment at once.
Lawn symptom | What it usually means | Better first task | What to do next |
Spongy surface with a brown mat over 1/2 inch | Excess thatch blocks water, air, and nutrients | Dethatching | Remove debris, then water and overseed thin areas |
Hard soil, puddling, and shallow roots | Compaction limits root growth and water movement | Core aeration | Aerate during active growth, then topdress lightly if needed |
Thin lawn with both spongy turf and hard soil | Thatch and compaction may be working together | Dethatch first, then aerate later if needed | Give grass recovery time between aggressive treatments |
Learning how to dethatch a lawn starts with a simple check: measure the thatch before you tear into the turf. If the layer is over about 1/2 inch, dethatching at the right time can improve water movement, nutrient access, and root strength. Work gently, clean up debris, and guide the lawn through recovery with water, feeding, and overseeding when needed. For long-term routine care after recovery, exploring GPS Robot Mowers can help you compare mowing options that support a steadier lawn care rhythm.
Yes, dethatching can damage a lawn if the grass is dormant, drought-stressed, very thin, newly seeded, or handled with an overly aggressive machine setting. Light surface disruption is normal, but deep tearing is not. Measure the thatch first, choose the right season, and start with a conservative tool setting.
If thatch is thicker than about 1/2 inch, dethatch first so aeration holes can reach the soil more effectively. If the main issue is compacted soil and thatch is thin, aeration may be enough. For lawns that need both, leave time for recovery and avoid heavy work during heat or drought.
Most lawns do not need dethatching every year. Check the thatch layer once a year, but only dethatch when it becomes thick enough to block water and nutrients. Some fast-spreading grasses may need it every few years, while slower-growing lawns may go much longer with proper mowing, watering, and soil care.