











FAQs
9/9/2026
Contents
Products
Residential Lawns










Explore
Where to Buy


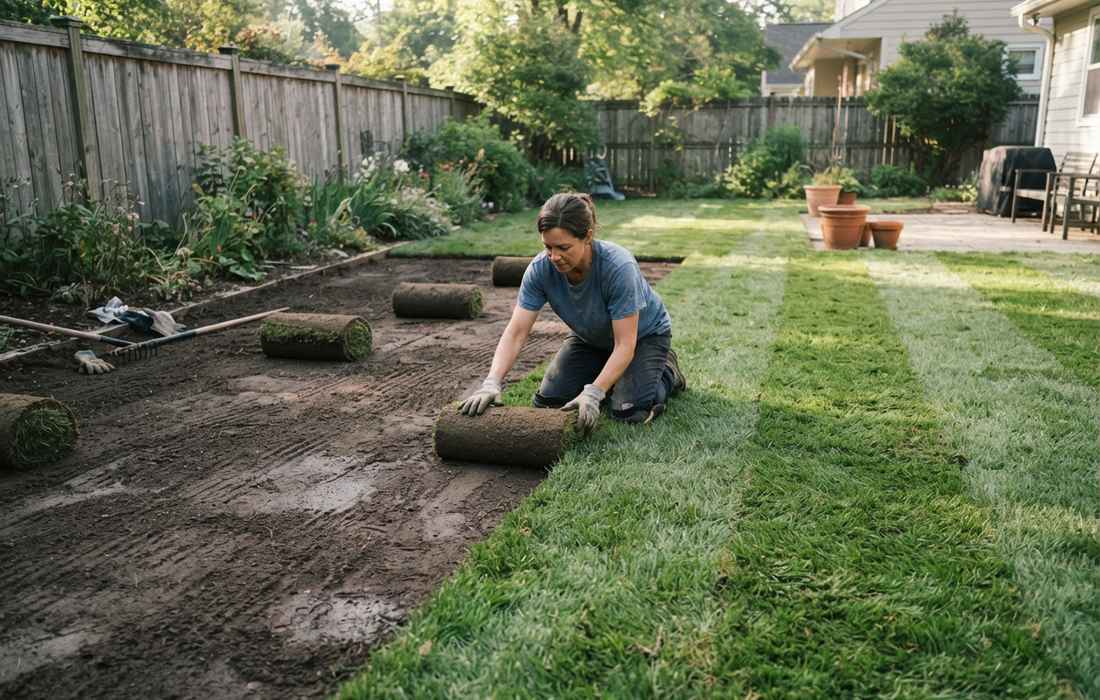
Lay sod on prepared, graded soil as soon after delivery as possible, ideally within 24 hours in warm weather. Start along a straight edge, stagger joints like brickwork, press pieces firmly into soil, and water immediately through the sod into the root zone. Keep the surface consistently moist during the first two to three weeks and delay heavy traffic until the sod resists lifting.
Sod gives you an instant green surface, but the real test comes after it is laid. If the soil is uneven, drainage is poor, or the rolls sit too long before installation, the new lawn can develop dry seams, soft spots, or weak rooting within days.
A successful sod lawn depends on getting the ground ready before delivery and helping the roots make firm contact with the soil afterward. This blog explains how to prepare the area, lay sod correctly, water it through establishment, and avoid the problems that slow down rooting.
Sod is the faster option when erosion control, immediate appearance, or a short establishment window matters. It provides mature turf cover at installation, but the roots still need time to knit into the prepared soil. Seed costs less per square foot and offers broader cultivar choice, but it can take weeks or months to reach comparable density.
Choose sod on slopes where bare soil would wash, in high-visibility areas that need fast cover, or when the grass species is commonly installed vegetatively. Choose seed when budget is the main constraint and you have the correct seasonal window plus the ability to irrigate a fragile seedbed frequently.
The same site problems affect both methods. Shade, compacted soil, standing water, or an unsuitable grass species will not be fixed simply because sod arrives as a dense roll.
Before ordering sod, consider your lawn’s size, soil condition, sunlight, grass variety, and delivery timing. A few key checks can help you order confidently:
Measure each lawn section in square feet: length times width for rectangles, then add smaller shapes. A 40-by-25-foot lawn is 1,000 square feet. For irregular sites, split the drawing into rectangles and triangles and add the areas.
Order about 5% extra for simple rectangular lawns and closer to 10% for many curves, narrow strips, or diagonal cuts. Confirm how many square feet are on each pallet because roll size varies by sod farm.
Buy a species and cultivar adapted to the region, sun exposure, and intended mowing height. Warm-season sod such as bermudagrass, zoysiagrass, and St. Augustinegrass is common in southern climates, while tall fescue and Kentucky bluegrass-based sod are common in cooler regions.
Ask the supplier for the exact cultivar and maintenance requirements. “Green sod” is not enough information to plan long-term mowing and irrigation.
Schedule delivery only after grading and soil preparation are complete. NC State Extension advises installing sod within about 24 hours of delivery and unstacking or unrolling it if a delay approaches 48 hours. Sod heats rapidly in a pallet, especially in warm weather.
Lay the most exposed areas first and keep remaining rolls shaded when possible. Do not saturate stacked rolls as a substitute for installation.
Finish drainage before sod. The soil should slope away from buildings according to local site practice, without depressions that collect water. Allow for sod thickness so the finished surface meets sidewalks, patios, and driveways without creating a raised trip edge.
Break compacted subsoil and incorporate amendments only when soil-test or site recommendations support them. A smooth surface can still be badly compacted underneath.
Good soil contact is what allows the existing sod roots to enter the site. Prepare a firm, fine-textured surface that supports a footprint without becoming hard like pavement.
Strip dead turf, stones, construction debris, and perennial weeds. If herbicide is used, follow the product label’s waiting period before sod installation.
Remove enough old material that the new sod will meet adjacent hardscape at the correct height. Do not bury an old thatch mat under the new lawn.
Loosen compacted soil several inches deep where practical. Add lime, phosphorus, or other amendments only according to a soil test and local turf recommendations.
If quality topsoil is needed to correct a construction site, spread it uniformly rather than creating thin pockets. Abrupt layers can interfere with drainage and rooting.
Rake the site smooth, then lightly roll or firm it. A footprint should leave only a shallow impression. Fill low areas and remove ridges before sod arrives because they will still be visible after the turf is laid.
Water very dry soil lightly before installation if needed, but do not create mud that prevents firm contact.
Lay in a consistent pattern and keep pieces tightly joined. Work off boards on soft soil so foot traffic does not create depressions under fresh sod.
Begin beside a driveway, sidewalk, or stretched string line. Lay the first row straight because every later row follows it.
Place pieces snugly without stretching them. Stretched sod can shrink back and open gaps as it dries.
Offset end joints like brickwork so four corners do not meet in one spot. Butt edges together firmly but do not overlap them.
On slopes, lay rows across the slope rather than running long seams downhill. Secure pieces if the sod supplier recommends staples for steep sites.
Use a sharp sod knife to trim around beds, trees, drains, and sprinkler heads. Avoid tiny scraps under about 6 inches wide when possible because they dry quickly; adjust neighboring cuts to create larger pieces.
Keep soil away from sprinkler nozzles and valve boxes so irrigation remains functional.
After a section is laid, roll it lightly or press it according to supplier guidance. The goal is to remove air pockets and create root-to-soil contact, not compact the soil beneath it.
Check corners and edges by hand. If a piece rocks, lift it, level the soil, and reset it instead of forcing it flat with weight.
Begin watering completed sections before the entire property is finished if the day is hot or windy. Water deeply enough that moisture passes through the sod and reaches the soil below.
Lift a corner after irrigation to verify moisture at the interface. Green leaves alone do not prove the root zone is wet.
The first weeks are about keeping the root interface moist while encouraging sod to knit into the underlying soil. Check moisture directly instead of watering from habit.

Check rooting before the first mow. Gently lift a corner of the sod; when it resists and the soil feels firm enough to support mower wheels without rutting, mowing can begin. A useful timing rule is to mow when the grass reaches about one-third above the target height, then remove only a small amount with a sharp blade.
Light foot traffic can return as rooting strengthens, while heavier play is better delayed until the sod has fully knitted into the soil, often around four weeks during active growth. Once the lawn is ready for regular mowing, a robotic lawn mower such as the Sunseeker Elite X4 can help maintain a consistent cutting height, with its 1.6-3.2 in cutting-height range allowing the mowing height to be adjusted as the new turf moves into routine care.
Laying sod successfully depends on good preparation and quick installation. Order enough material, finish grading before delivery, lay the sod within about 24 hours when possible, stagger the joints, press each piece firmly against the soil, and water right away. Keep the root zone consistently moist during the first few weeks and limit traffic until the sod is firmly rooted. Once the lawn is established, Robot Lawn Mowers without Perimeter Wires can help automate regular mowing without installing a buried boundary cable through the newly established turf.
The best time to lay turf is usually September to October or March to May, when the soil is moist and temperatures are mild. Early autumn is often ideal because roots can establish before winter with less heat stress. Avoid laying turf during frost, waterlogged conditions, or very hot, dry weather.
Prepare firm, graded soil rather than putting sod over old turf or loose debris. Correct pH and nutrients from a soil test, loosen compacted soil, and add quality topsoil only where needed. Rake the surface smooth and lightly firm it. Starter fertilizer should be used only when local turf guidance and the soil test support it.
Yes, laying turf yourself is manageable for a small, level lawn, but the preparation takes most of the work. Remove weeds, loosen and level about 4 inches-6 inches of topsoil, firm the surface, and lay turf immediately after delivery. Stagger the joints, press each roll firmly against the soil, and water thoroughly the same day.