










FAQs
8/13/2026
Contents
Products
Residential Lawns









Explore
Where to Buy


A bumpy lawn usually comes from soil settling, frost heave, animal activity, thick thatch, drainage problems, or uneven repair work. Small dips can be topdressed with a sand-soil-compost mix. Deeper low spots need lifted sod and added soil. Severe uneven ground may need regrading, drainage work, and reseeding.
Uneven ground often becomes obvious when you start using the lawn, not when you look at it. A mower may shake over small rises, puddles may stay in shallow dips, and chairs or play equipment may never sit quite level.
This blog explains how to level a bumpy lawn by measuring the uneven areas, matching the repair method to the depth of the problem, choosing the right soil mix, and helping the grass recover so the surface stays flatter over time.

Bumps rarely appear for only one reason. Before leveling, look at the pattern, soil condition, and water movement. These clues help you choose the right repair instead of adding soil over a problem that will return.
The safest repair starts with measuring the depth of the uneven spots. Lay a straight board or level across the area and measure the gap below it. A small dip needs a different fix than a deep hollow, and severe uneven ground may need grading instead of simple topdressing.
Mild unevenness usually means shallow dips under about 1/2 inch deep. The grass is still rooted, the mower does not scalp badly, and water does not sit for long. These areas are good candidates for light topdressing. Add a thin layer of mix and leave the blade tips exposed.
Moderate unevenness often measures about 1/2 inch to 2 inches deep. You may feel the mower bounce, see small puddles, or notice a few scalped spots after mowing. These areas may need several thin topdressing rounds or a lifted-sod repair. Do not bury healthy grass under thick soil.
Severe unevenness includes low spots deeper than 2 inches, sharp ridges, trip hazards, drainage channels, or areas where soil keeps sinking. These problems often need regrading, drainage correction, or larger soil work. If the dip sits near a foundation, driveway, retaining wall, or irrigation line, inspect it carefully first.
The repair method should move in order: identify the cause, prepare the surface, level the soil, and protect the new growth. Rushing straight to seed or sod may hide the damage for a short time, but the lawn can settle again if the base is still loose or poorly drained.
Mow the repair area slightly lower than normal, but do not scalp it. For many cool-season lawns, 2 to 2.5 inches is low enough for inspection. Rake up clippings, leaves, and loose debris so you can see the soil surface clearly.
Walk the lawn in a grid pattern and mark low spots with flags, chalk, or small stakes. Mark high ridges too, because some bumps need gentle shaving, especially where roots, tunnels, or previous patching pushed soil upward.
For shallow dips, spread leveling mix in layers of about 1/4 inch at a time. In stronger turf, you can use up to 1/2 inch, but grass blades should still show through. Use a rake or lawn lute to work the mix into low areas.
Water lightly after topdressing so the mix settles around the crowns. Wait two to four weeks before adding another layer if the dip still shows. Repeating thin applications is slower than dumping soil at once, but it protects existing turf and gives the surface a smoother finish.
For low areas around 1 to 2 inches deep, cut three sides of the turf with a sharp spade and fold the sod back like a flap. Add screened topsoil or leveling mix underneath, firm it gently, and check the height with a board. Replace the sod, press the edges together, and water deeply.
This method keeps the existing grass instead of burying it. It works well for isolated depressions, sunken sprinkler trenches, old root pockets, or low spots beside paths. Keep the repaired area moist for 10 to 14 days so the roots reconnect with the soil below.
For deep, widespread, or drainage-related unevenness, regrading may be the better choice. Remove poor turf, loosen the soil, correct the slope, and add quality topsoil where needed. A safe yard grade should move water away from buildings, often at about 1/4 inch per foot for the first several feet near the house.
Large regrading jobs may require a landscape rake, wheelbarrow, sod cutter, or compact tractor. If water runs toward the home or soil keeps washing away, ask a lawn or drainage professional to inspect it. A smooth lawn will not last if water keeps moving soil out of place.
The best leveling mix depends on your existing soil. A good mix should settle firmly, drain reasonably well, and support grass roots. Avoid heavy garden soil, sticky clay, or uncomposted organic matter because these materials can clump or shrink.
For many home lawns with loam soil, a practical DIY blend is about 50% screened topsoil, 30% coarse sand, and 20% finished compost. The topsoil gives structure, the sand improves workability, and the compost adds organic matter. Use sharp or coarse sand, not play sand, because very fine sand can pack tightly.
If your lawn has heavy clay, be careful with sand-heavy mixes. Sand added poorly to clay can create a dense, hard layer. For clay lawns, use more screened topsoil and compost, and add sand only as part of a well-blended mix. For sandy lawns, use more topsoil and compost so the repair area does not dry out too fast.
Screen the material before applying it. Stones, sticks, mulch chunks, and thick compost pieces can leave new bumps. For a fine finish, the mix should pass through a 1/4 inch screen. For seed repairs, keep the top 1/4 inch loose but stable.
A repaired lawn needs steady care while soil settles and grass fills in. The goal is to protect the new surface, build roots, and spot small changes early.
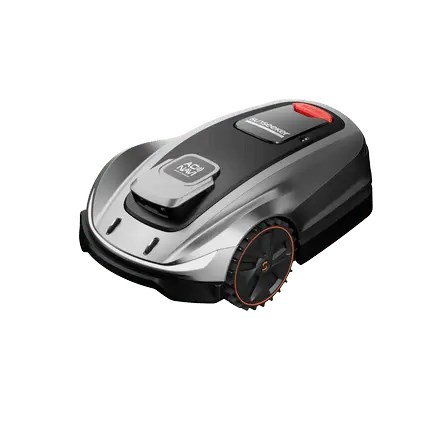
After the repair has settled and the lawn returns to a regular mowing rhythm, consistent light cutting keeps the surface cleaner and makes new low spots easier to notice. The Sunseeker Elite X4 supports that routine with 360-degree 3D LiDAR plus Vision AI for wire-free navigation, virtual boundaries, and a floating cut system that follows everyday lawn contours. For a leveled, re-established yard, that steady routine helps repaired areas blend in.

Learning how to fix a bumpy lawn starts with the cause and depth of the uneven spots. Shallow dips can be topdressed, deeper spots may need lifted sod and added soil, and severe areas often need regrading or drainage work. Once the lawn is smooth again, consistent mowing, watering, and inspection help protect the repair. You can also explore GPS Robot Mowers for easier long-term lawn maintenance.
You can use sand as part of a leveling mix, but pure sand is risky on many home lawns. On clay soil, too much sand can create a hard layer. A safer mix usually combines screened topsoil, coarse sand, and finished compost so the repair drains well and still supports grass roots.
Rolling can press very minor frost heave or loose sod back into place, but it will not fix deeper dips, drainage problems, animal tunnels, or settled soil. Heavy rolling can also compact the ground and weaken roots. Level low areas with soil first, then use a light roller only if it truly helps firm the surface.
The best time is during active grass growth, so the lawn can recover quickly. For cool-season grasses, early fall or spring often works well. For warm-season grasses, late spring through early summer is usually better. Avoid leveling during drought, extreme heat, frozen soil, or right before heavy rain.