










FAQs
7/16/2026
Contents
Products
Residential Lawns










Explore
Where to Buy


Want a green lawn without waiting months for grass seed to grow? Laying sod is a faster solution that delivers instant coverage. The process starts with proper ground preparation, careful sod placement, and proper moisture maintenance after installation. With the right approach, you can transform bare or damaged areas into a lush, usable lawn much faster.
If you don’t want to wait months for grass seed to grow and fill in, installing sod is the fastest way to achieve an instantly green lawn. It offers immediate coverage and delivers a uniform look right away. So, how to put sod on a lawn? This blog is a complete beginner’s guide. You can learn when to use sod, how to prepare your lawn, step-by-step installation instructions, and essential post-care tips. Just make sure to continue reading!
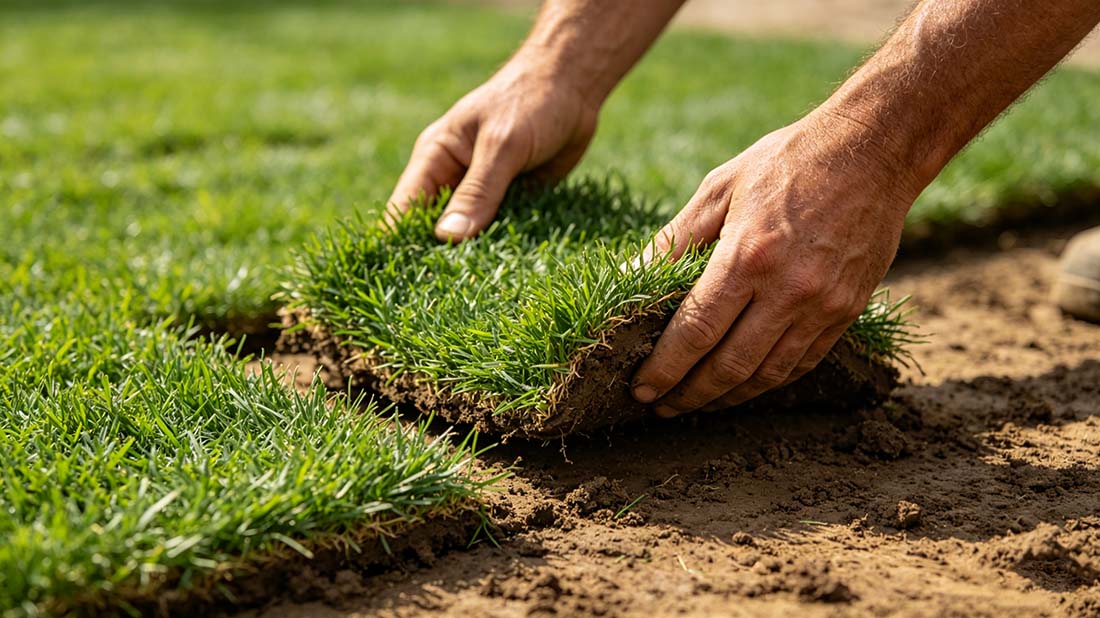
Sod is pre-grown grass that comes with a thin layer of soil and an established root system, which is harvested in rolls or squares for convenient installation. Unlike seeding that might take weeks or even months to fully establish, sod provides an immediate green lawn with minimal waiting time.
Generally, sod is an excellent choice for these scenarios:
Proper preparation is the foundation of a successful sod installation. Before you put down sod on a lawn, it’s essential to follow the right preparation steps to ensure strong root establishment.
Calculate the total square footage by multiplying length by width. Always order 5-10% extra sod to account for trimming, irregular edges, and potential waste.
Use a home soil test kit or submit a sample to a third-party service. Check the pH (ideal between 6.0 and 7.0). Based on results, amend the soil with lime, sulfur, or nutrients as needed.
Remove all debris, weeds, and existing grass. If necessary, apply a non-selective herbicide and wait the recommended time before proceeding. For heavy weed infestations, consider solarization with plastic sheeting or remove old turf with a sod cutter.
Loosen the soil to a depth of 4-6 inches. Incorporate 2-3 inches of compost or organic matter to improve soil structure and fertility. Rake the surface smooth and ensure a slight slope away from buildings for proper drainage. Lightly roll the soil to create a firm, even base, then apply a starter fertilizer rich in phosphorus.
Lightly moisten the prepared area before installation. This ensures immediate root-to-soil contact, which is essential for proper establishment.
With your area properly measured and the soil fully prepared, follow these steps to plant a lawn from sod.
Begin laying sod along a driveway, sidewalk, or string line to create a straight foundation. A properly aligned first row ensures the rest of the lawn stays even and easier to install as you continue.
Place each new row in a brick-like pattern, offsetting the seams from the previous row. This prevents long visible lines, improves structural stability, and helps the sod pieces knit together more naturally as roots establish.
Position each sod piece snugly against the next without overlapping. Trim excess with a sharp knife to fit around trees, curves, or garden beds. This ensures consistent coverage and eliminates gaps that could dry out.
Use a lawn roller half-filled with water or walk gently across the surface to press sod into the soil. Firm contact removes air pockets and ensures roots connect directly with the prepared ground beneath.
Put sod on a lawn in manageable sections to maintain consistency and prevent drying. Avoid stepping repeatedly on newly placed pieces; excess pressure can shift alignment and interfere with proper root establishment.
Unfortunately, you can not install sod directly over an existing lawn. Experts strongly recommend removing the old grass first to achieve the best results. Laying new sod on top of existing turf prevents proper root-to-soil contact, which can lead to drying out, weak establishment, and eventual failure.
In limited situations, you may lay sod over an existing lawn that is very thin or already dying. You can smother it with a thick layer of compost or cardboard before laying sod. However, this approach is less reliable and may not deliver consistent, long-term results.
It’s not as difficult as it may seem to put sod on a lawn, but proper aftercare is essential for long-term success. Follow these care guidelines to help your lawn thrive.
Watering Routine: Keep the sod consistently moist by watering multiple times a day in short sessions. Each cycle should dampen the sod and the underlying soil. Water early in the morning and again in the late afternoon to reduce evaporation; avoid nighttime watering to prevent disease.
Limit Foot Traffic: Avoid walking on the lawn as much as possible during this stage. If necessary, use a board or plywood to spread your weight evenly and prevent indentations from forming beneath the sod.
Check Root Progress: After about 10 to 14 days, gently pull up on a corner of the sod. If it resists lifting, this indicates the roots are starting to anchor into the soil below.
Adjust Watering: Reduce watering frequency but increase the amount each time. Water deeply two to three times per week so moisture reaches deeper soil layers. Go for 1 to 1.5 inches of water weekly.
First Mowing: Once the grass reaches approximately 3 to 4 inches tall and feels firmly rooted, it’s ready for its first mowing. Remove no more than one-third of the blade height to avoid stressing the grass.
Resume Light Use: Light foot traffic can gradually return, but avoid repeated pressure in the same spots to prevent damage.
Regular Watering Schedule: Deep watering once or twice per week, depending on weather conditions.
Fertilizing: Wait at least 4 to 6 weeks before applying fertilizer. If a starter fertilizer was used before installation, delay additional feeding to avoid overloading the new lawn.
Ongoing Care: Monitor your lawn for weeds, pests, or dry patches. Address issues early and maintain consistent mowing and watering habits.
Whether for that crucial first mow or ongoing lawn maintenance, modern robotic mowers are incredibly helpful. For instance, AWD robotic mowers are particularly beneficial for new sod; their superior traction prevents wheels from slipping or spinning on the delicate, unanchored turf, ensuring the surface remains level. This can effectively protect young roots from damage during the early establishment phase.

For reliable performance on newly laid sod and varied yard conditions, consider the Sunseeker Elite X4. This advanced robotic mower features an adjustable cutting height (1.6 to 3.2 inches), allowing you to safely trim grass at the ideal height as it establishes. Its off-road wheels provide non-slip traction, making it suitable for uneven terrain while reducing disturbance to young roots. The rear wheel suspension helps prevent two major threats to a new lawn: scalping and uneven cuts, which ensure healthier and more consistent growth. With intelligent navigation and customizable schedules, the Elite X4 maintains your lawn effortlessly, supporting a professional-looking yard with zero manual labor.
How to put sod on a lawn? You can start with the soil preparation, then carefully install each piece of sod to ensure strong root contact. After installation, make sure to provide consistent aftercare to help roots establish. The previous parts have covered everything you need to know. Just the steps, and you’ll be on your way to a beautiful lawn easily. For effortless maintenance after installation, consider Sunseeker AWD robotic mowers. These advanced mowers provide superior traction and stability, allowing them to handle uneven terrain while minimizing disturbance to newly established grass. Explore Sunseeker and take the next step toward reliable lawn care now!
Yes, you can lay sod on dirt, but proper soil preparation is essential for success. Remove debris, loosen the soil, add organic matter, level the surface, and ensure the ground is slightly moist before installation. If you just place the sod on hard, untreated dirt, it will prevent roots from developing properly and lead to uneven growth or lawn failure.
Yes, installing grass sod yourself is possible, especially for small to medium-sized lawns. With a shovel, rake, utility knife, and lawn roller, most homeowners can complete the project successfully. However, for larger yards, uneven terrain, or complex landscaping, it might require professional help to ensure proper preparation and installation.
Sod usually begins developing shallow roots within 10 to 14 days, while stronger root systems usually establish within 2 to 6 weeks. The exact timeline depends on grass type, soil conditions, weather, and watering habits. Consistent moisture and limited foot traffic during the first few weeks are essential, which helps new sod become fully established.