FAQs
5/13/2026
Contents


A weak mower battery often shows up as slow starting, clicking, dim lights, or power loss after storage. Charging depends on the mower type: riding mowers usually need a low, steady charger, electric push mowers use their matching battery charger, and robotic mowers return to the dock on their own. Good charging habits help the battery last longer.
A lawn mower that won’t start often comes down to one issue: the battery. Whether it’s been sitting idle through winter or losing charge mid-season, knowing how to charge a mower battery helps you get back to work without guesswork. This guide breaks down when charging is needed, how to handle different mower types, and how long the process often takes. Read on for clear, practical steps that keep your mower ready.
Battery issues rarely appear without warning. Charging a lower mower battery becomes necessary in a few common situations, as listed below.
Charging methods vary slightly by mower type, but the core principles remain the same: safe connection, the correct charger, and proper timing. Below are the precise steps for the three primary categories of mowers.
While the engine in a gas-powered riding mower runs on fuel, it relies on a small lead-acid or lithium battery to engage the starter motor. If the battery doesn’t get charged after extended storage, it may die. Follow these steps for charging a ride-on mower battery safely.
Step 1. Turn off the mower and remove the key. This prevents accidental starts and protects electrical components.
Step 2. Locate the battery. Usually, it is placed under the seat or hood. Check for corrosion or loose terminals before charging. It’s not a must to disconnect the battery. However, you can do it to reduce the risk of short circuits.
Step 3. Attach the positive clamp (red) to the positive terminal, then the negative clamp (black) to the negative terminal.
Step 4. Now, you can select the correct voltage and mode. Most riding mower batteries are 12V. Use a low, steady charge (2–6 amps) for a slower, safer charge.
Step 6. Charging typically takes several hours. Although many modern chargers stop automatically when full, monitor the charging process to avoid overheating.
Step 7. Reconnect terminals if removed, then start the mower to confirm the battery holds a charge.
Electric push mowers rely entirely on rechargeable batteries. Regular charging is part of normal use. Unlike older battery types, lithium-ion packs don’t require full discharge before recharging, which simplifies routine use. Here’s how to charge an electric push mower battery.
Step 1. Remove the battery pack from the counterpart. Most models use detachable lithium-ion batteries for easier handling. If the battery is extremely hot from recent use, allow it to cool for about 15-20 minutes.
Step 2. Connect the terminals to a standard outlet. You should use the manufacturer-provided charger. Generic chargers may not match voltage or safety requirements.
Step 3. LED indicators usually show charging status, and wait for the full charge indicator. Avoid interrupting the cycle unless necessary.
Step 4. Once fully charged, insert it back into the mower until it clicks securely.
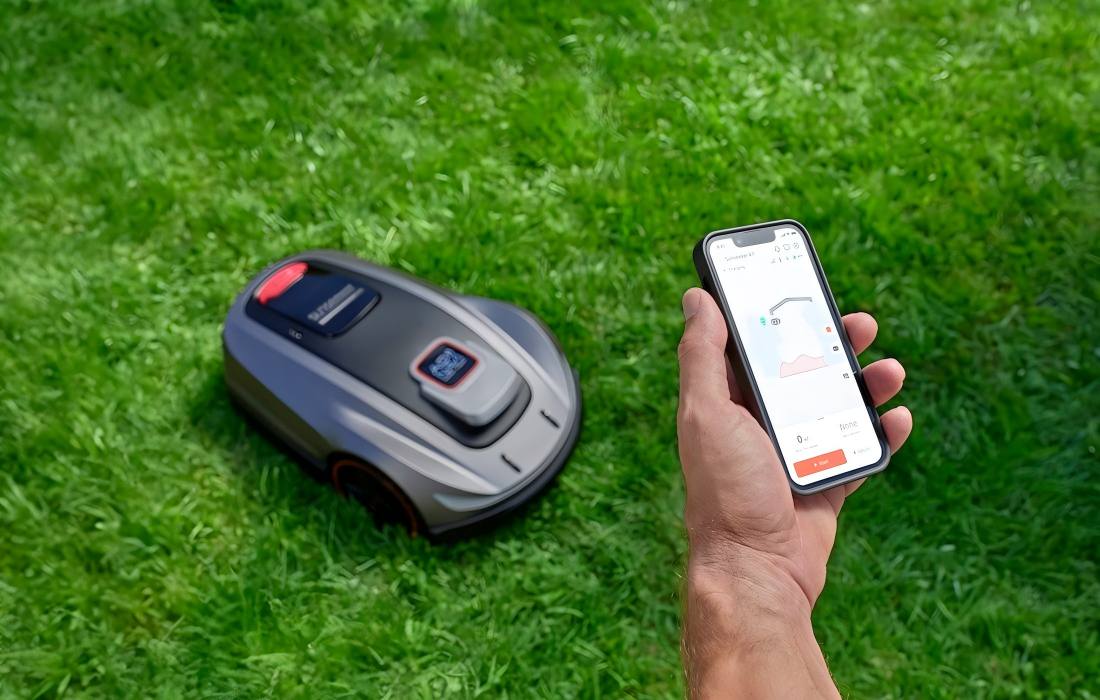
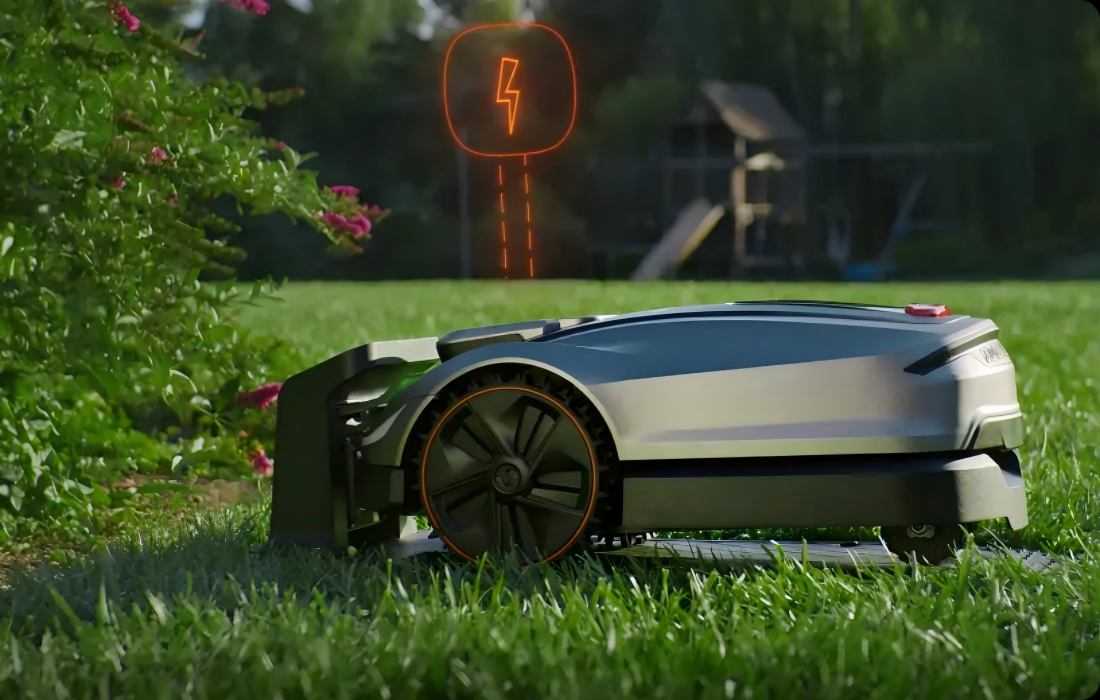
Robotic mowers typically come with charge stations for auto-recharge. Once configured, they will return to their station whenever the battery is low. This ensures minimal manual intervention. Models like the Sunseeker Elite X4 are a good example. You can place their charging stations where they work, even in places where signals are partially covered. Once the units detect a low battery, they will plan the return routine smartly for recharging. The X4 model can also continue mowing from the area it stops. Theoretically, they are always ready for the next scheduled cut.
You can find how to charge a robotic lawn mower battery below.
Step 1. Place the charging dock on level ground near a power source. This ensures a stable electricity supply for consistent charging cycles.
Step 2. Follow the setup guidelines to configure the station.
Step 3. The mower aligns itself and begins charging automatically. You can monitor the current percentage via the status lights or a dedicated mobile app.

The time required to charge a mower battery depends on the battery’s capacity and the charger’s output. Below is the general charging time for reference.
Proper charging habits can extend the life of your battery by several years. Here are some small adjustments you can follow.
Understanding how to charge a mower battery is a simple but vital part of property maintenance. Gas-powered, electric, and robotic mowers each follow slightly different charging methods. You can keep this comprehensive guide for reference. For those looking to reduce manual work, robotic options like Sunseeker models simplify charging through automation. Take one home to see how hands-off lawn maintenance is made possible!
Yes, but results depend on how deeply it was discharged. Lead-acid batteries left empty for too long may lose capacity permanently. A slow charge can sometimes recover them, but not always to full performance. Lithium batteries are less tolerant of complete discharge and may require replacement if damaged.
Charging frequency depends on usage and mower type. Gas-powered riding mowers may only need charging after extended inactivity or weak starts. Electric mowers should be charged after each use. Robotic mowers manage this themselves, but you should check their charge level every few months during the off-season. Regular checks help avoid unexpected failure, especially during peak mowing season.
Common causes include deep discharge, long-term storage without charging, extreme temperatures, and using the wrong charger. Corroded terminals and frequent short runs can also reduce battery life. Addressing these factors early helps maintain reliable performance and delays replacement.